Art at Home : Where to Start
This is the first of a series of posts on how to set up a kid-friendly art studio at home without giving up all your space or your sanity. Making art with your kids is an excellent family activity…we all know this, but all too often what is intended to be a warm, fuzzy, creative moment turns into a disastrous mess that your kids aren’t even that interested in. The answer is to create a home studio space with an array of engaging supplies that children can easily access on their own…or mostly on their own, depending on their age. And for the record, I am not talking about the perfectly polished Pinterest-worthy studios you might see online. While beautiful to look at, they are not realistic when it comes to kids and art-making!
Of course, everyone’s space is different as is their tolerance for mess and/or clutter. That’s ok. It’s my hope in these posts to spell out all the tips and tricks I’ve developed over the years as an artist, a primary school art teacher of 10 years, and now as a mom of two creative, non-stop kiddos. Wherever you fall on the spectrum of comfort when it comes to kid-friendly art in your living space…Whether you are a parent, a daycare provider, a grandparent, a home school family, etc, I hope these ideas will help pave the way for fun, accessible, and sanity-saving creativity in your home.
This first post will cover the basics of creating space and sorting out the supplies you already have. I will also offer suggestions for recycled and household items that you can start collecting. Chances are you have some really great art-making materials in many corners of your house, you just don’t know it yet!
Make Space. Most families would probably agree, space is at a premium in most homes. With this in mind, giving up more precious space for an art studio space might feel like a stretch, but trust me, it will be worth it. Consolidate toys, eliminate a junk drawer or two, clear out a closet…do whatever you need to carve out enough space.
Space for what exactly? You’re going to need a flat surface such as a table, a desk, or counter top for children to work at. Too small an area is going to be a challenge. Avoid those teeny tiny kid size tables if possible. You’ll also need an area to store bins of supplies. A standard size cupboard space is about all you need. If you don’t have an available cupboard near your work area, a portable cart or two is a great option. You could find an old AV cart or something like this wheeled cart can be purchased pretty reasonably. The glory of a cart is that it makes your studio mobile which may serve you well depending on your space. Along with storage for the supplies in-use all the time, you will also need a space to store back up supplies or supplies for re-stocking. (this will be explained in a later post!). If you can spare another cupboard or a closet for these materials, that would be ideal. These do not need to be stored close to your work space, so basement or attic storage space would be perfect options for this as well.
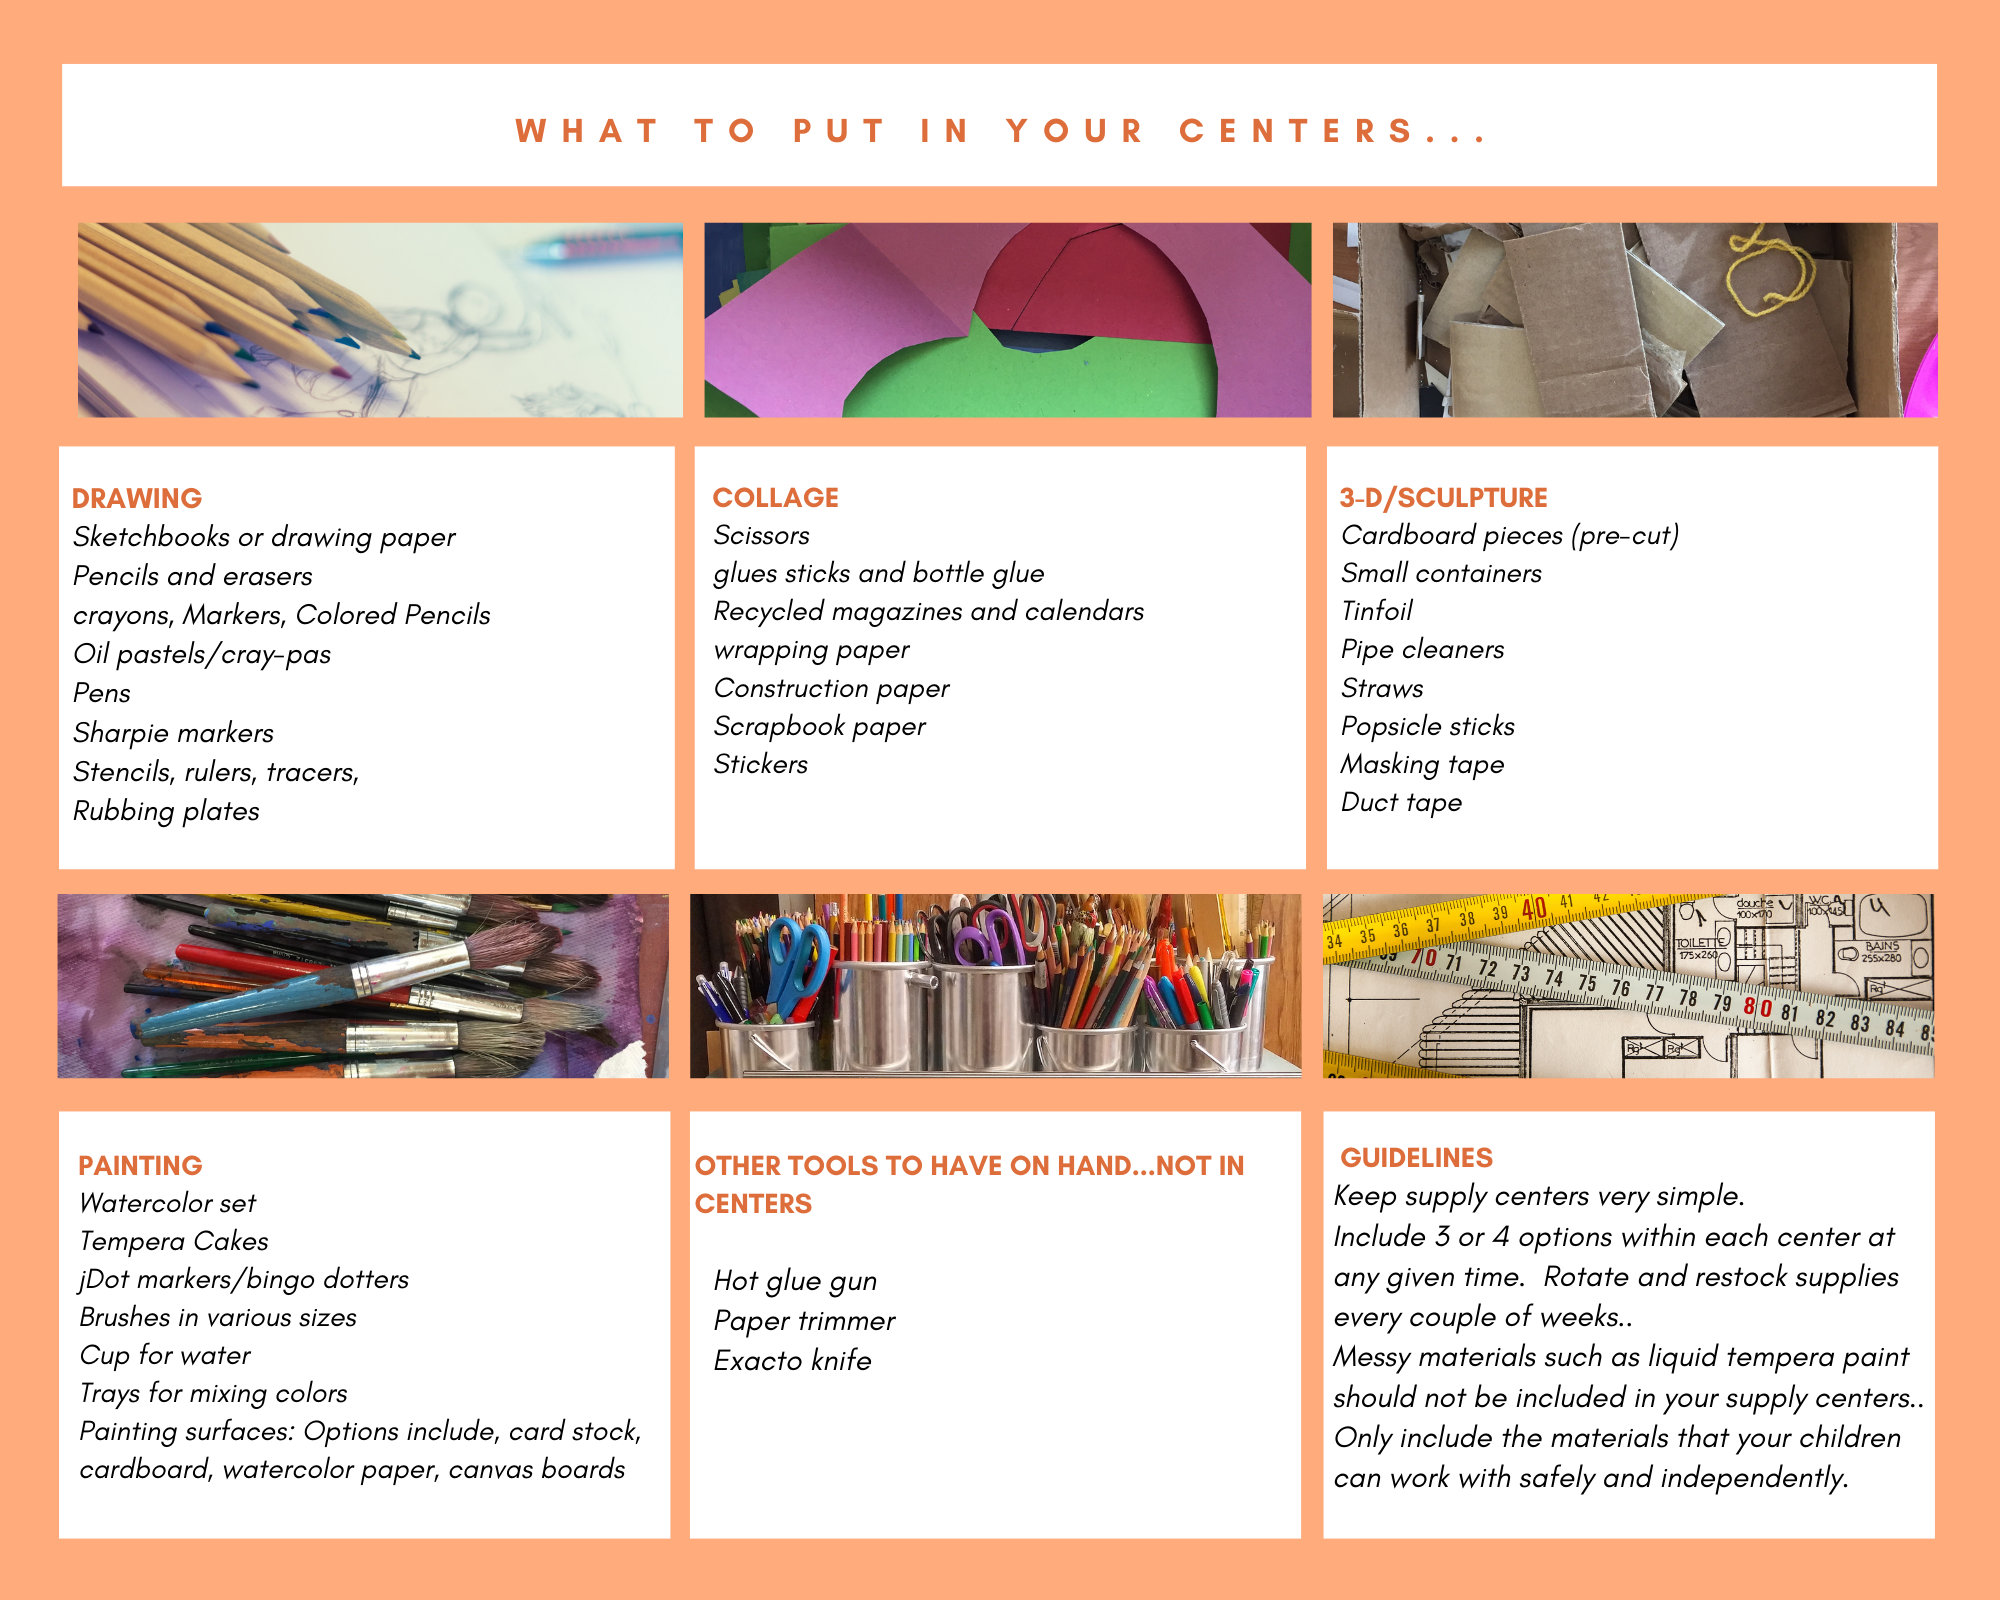
Sorting the Supplies You Already Have. Approach this step like you would sorting through your wardrobe. If no one has touched a certain supply in months or years, it’s probably not of interest and can be donated elsewhere. You should carry out this step in the storage area that you have designated as your re-stock/stock pile storage. This might mean that you have to relocate everything from your current storage space to a new space. If you can get them all into a central locale, it will save you a lot of trouble later. When going through supplies, remember that broken stuff is no fun to work with and does not inspire creativity. If all the crayons are broken, try a crayon melt project or throw them out. If the markers are out of ink, Crayola has an amazing marker recycling initiative. Check it out here. If all the construction paper is crumpled and bent, put that in a separate pile for a torn-paper project or cut into smaller pieces. Anything that is still usable, begin sorting it into four basic groups. Drawing, Collage, Painting, and 3-D/Sculpture. Use a few boxes to sort things into initially or just designate an area on the shelf for each category. You can also start a box of tools…scissors, hole puncher, pencil sharpener etc. The main thing here is to declutter and remove anything broken, crumpled, or junky. If it doesn’t spark creativity, get it out of there!
Trash to Treasure and Finding Gold in Your Junk Drawers. If you already collect recyclables such as cardboard, egg cartons, containers, and tin cans keep it up! If you don’t, now is the time to start! These items make excellent sculpture material. Cardboard is also a great surface for painting and for chalk drawing. Plastic containers and tin cans can be used for storage and as sculpting material. Old calendars, magazines, catalogs, and wrapping paper all make excellent collage material. Small toys, buttons, nuts and bolts, etc. are also fair game for fun sculpting opportunities. Except for a hot glue gun and making tape, everything in our sculpture center is stuff that was 100% free and recycled. Other household items that can become art materials include tinfoil, paper plates, paper cups, coffee filters, cupcake liners, and wooden or plastic spoons, just to name a few. So much can be created without spending an arm and a leg. It just takes some time and a bit of effort to collect, sort, and store.
Thinking ahead to the next step. Use the lists below as a basic supply inventory for each of your supply “centers.” This will help you determine whether you need to purchase anything or if you already have plenty to get you started. More about actually using these supply centers in the next post!